What Is the Principle of Air Conditioning?

The rapidly rising temperatures in many parts of the world due to global warming have seen massive air conditioning market growth. An air conditioner (AC) is slowly becoming a necessity for any interior space, and the manufacturing of ACs has significantly gone up.

For example, an air-conditioned office is much more comfortable and allows employees to be more productive than an office with no air conditioner. 

The AC is designed to cool the hair in the interior space and keep you cool and comfortable. But what is the principle of air conditioning? What makes an air conditioner such an efficient tool in dealing with temperature fluctuations? 

Please continue reading to find out how air conditioners work and what makes them a valuable asset for all interior spaces, including your home as given by HVAC repair services providers. 

The Standard Principle of Air Conditioning

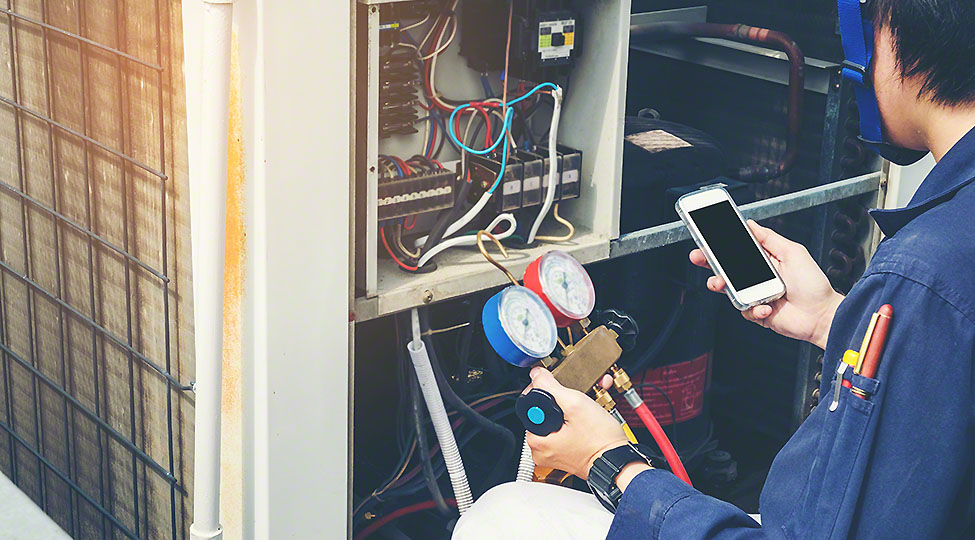
Air conditioning is based on the principle of vapor compression cycle aimed at reducing the air temperature through the help of a condenser, compressor, an expansion valve, and an evaporator. This occurs through an efficient heat transfer from the room air to the refrigerant gas and the evaporator. 

Once set to your desired degree, a thermostat inside the air conditioner constantly monitors the room’s temperature. If the air in the room is hotter than desired, the air conditioner collects the hot air from the room, passes it through a refrigerant and a series of coils to cool it down, and then released it back into the room. 

How It Works

The hot air is sucked into the AC through a grille at the indoor unit base, and then it flows through interior AC pipes with refrigerant/ cooling fluid running through them. This liquid absorbs the heat from the air and eventually becomes hotter.  

The cooled air flows into the evaporation coils, absorbing any heat left in the air and expelling moisture in the air before releasing it back into the room.

The now hot cooling fluid is then passed through a compressor located on the external unit in split AC. The compressor then compresses this liquid into high-pressor gas. This process heats up the cooling liquid even more. 

The hot vapor is now passed through to the condenser, which then condenses it back into a liquid by removing the hot air and transmitting the air into the outside atmosphere through metal fins. This cooling fluid then flows through the expansion valve and is sent back to start the cycle again. 

This process is repeated over and over again until the room acquires the desires temperature.

Modern air conditioners not only keep you cool in hot summer weather but are also fitted with washable or disposable that help keeps allergens and other pollutants from getting into your interior. Therefore, keeping the quality of the air inside healthy and clean. 

Five Components Supporting the Air Conditioning Principle

The air conditioning principle relies on the following five components to be successful. 

Refrigerant

A refrigerant is a crucial chemical that helps absorbs heat from the incoming air. It can be in either liquid or gaseous forms, such as Freon gas or R-22 refrigerant.

Evaporator

An evaporator works as a heat exchanger. It is also in charge of removing all moisture from the air to stabilize the room’s humidity. 

Compressor

A compressor is in charge of compressing the refrigerant into high-pressure vapor before passing it over to the condenser for reprocessing. 

Condenser

The condenser is the external unit that receives the vaporized/high-pressure refrigerant from the compressor and changes it into liquid before passing it through the expansion valve.

Expansion Valve

The expansion valve controls the now reprocessed refrigerant gas flow before it goes back to start the cycle.

So How Does an Air Conditioner Work?

It might look easy, but an air conditioner’s cooling process is a high-efficiency collaborative process. Every component in this process is crucial, and all the parts should work together for the air conditioning to be successful.

To keep the unit in top working condition, work with experienced air conditioning companies Vienna to regularly inspect and tune up the appliance.
Are Granite Countertops Maintenance Free

If you are asking, are granite countertops maintenance-free? You must lead a busy life so you are looking for countertops that don’t need a lot of attention. Although granite doesn’t need a lot of care, you need to pay some attention to it. Some of the things you need to do to keep it in good shape include:

Clean the countertops

This is the most important thing you need to do to the countertops. While it’s vital you clean the counters, the cool thing is you don’t have to be fancy about it. Simply clean the surfaces with a damp piece of cloth and soap and you are good to go. For better results, use a cleaner specially designed for granite surfaces.

When you are in the store making the purchase, pay close attention to the finer details and ensure the cleaner has a neutral pH, and it’s designed for granite.

Regardless of how dirty the countertops are, never use vinegar, ammonia, or any other acidic cleaners, as they will remove the countertop sealant putting the countertops at the risk of staining.

Get rid of spills as soon as they happen

Spills happen in unprecedented ways. You might be taking your breakfast then coffee accidentally spills on your countertop surfaces. When this happens, move with haste and remove the spills before they get to the inner layers where they get hard to remove.

You might argue that as long as you have sealed the countertops you have nothing to worry about, but this isn’t the case. Granite is naturally porous and leaving any liquid on it for a substantial amount of time the liquid is bound to get to the inner layers and stain the surfaces.

So as mentioned, to prevent this from happening, get rid of the spills as soon as they come about.

Remove stains as soon as possible

Even with the best care, stains can happen. For example, cooking oil might have got to the inner layers of the countertops. When you notice these stains, don’t put off removing them. Instead, remove them immediately. The good thing is you don’t have to hire a professional to help you with the stain removal as there are plenty of home tricks you can use.

One of the most effective ways is mixing baking soda and water to make a creamy paste. You should then use a soft cloth or sponge to rub the paste on the stained area then rinse it thoroughly with water. Don’t despair when the stain doesn’t come off on the first try. Sometimes the stains might be too deep in the countertop layers and you have to repeat the process a few times to completely remove them.

If you have applied the above paste and still the stain won’t come out, consider applying this paste on the stained spot and leave it there. You should then cover the area with plastic wrap and tape the edges with tape.

Keep everything in place until the paste dries after which you should remove the plastic wrap, wipe away the paste with a soft cloth then rinse the spot with water.

Reseal the countertops

At the time of installation, granite countertop installers NC seal the surfaces but this isn’t enough to keep the countertops stain proof. To reduce the chances of the countertops staining, you need to reseal the surfaces at least once a year. You can do the sealing by yourself or hire a contractor to help you out.

For best results, use a high-quality sealant specially designed for granite.

5 Golden Tips on How to Lay Pavers

Pavers bring out the character of your property regardless of its shape and color. The beauty of pavers is there are many of them to choose from. There are travertine, granite, concrete, shell stone, marble and many others.

To get the most from the pavers, you have to install them properly. You can do the installation on your own if you have the skills or hire local patio builders to help out. Regardless of the person installing the pieces, you should lay them properly. To help you out, here are tips on how to lay pavers.

Lay a strong gravel base

Your pavers are as stable as the base they are sitting on. Unfortunately, to cut corners and reduce installation costs, many homeowners use dirt as base or backfill. While the dirt is easily available and cheap, it comes with plenty of issues.

For one, when you use dirt, the pavers can rotate and separate. Due to this, instead of having a smooth surface, you have a bumpy, uneven surface.

To avoid this, use road base gravel instead of dirt. This way, you have the right mix of fine and coarse aggregates so you get the best compaction.

After laying gravel, spread a smooth layer of concrete sand for your pavers to settle in and stay in place.

Have a deep base

For stable, beautiful pavers, you should excavate enough dirt to lay a proper grave base. A good rule of thumb is to dig 4” for common foot traffic areas and 6-10” for driveways and residential parking lots.

If you live in colder climates that are always wet and have weak soils, add an extra 2-4”.

Compact the base enough

Before you lay, the paves, ensure the gravel base is flat and firm. It shouldn’t have any bellies or rises of more than 1/8”. To achieve this, properly compact your base and pavers. You should note that you end up with sunken or raised pavers if you fail to compact your base.

For best results, compact your gravel base in both directions with a plate compactor or steel tamper.

Properly install bedding sand.

Bedding sand comes in handy at helping the stones settle firmly into the base and stay in place. The sand also serves as a levelling layer to even out any minor issues in the gravel base.

To get the best results, properly install the bedding sand. To do it, apply the screeding process. Here you lay and level the bedding sand at the same time.

You first lay a few 1” outside diameter screed bars to the compacted base then after ensuring they are level, bring in the sand.

You shouldn’t lay more than 1” of bedding sand as it will promote settling or wobbling of the pavers.

Place the pavers using the click and drop method.

You can’t just throw the pavers anyhow and expect them to stay in place—you need to have a formula. The correct way to do it is to use the click and drop method.

If you don’t use this method, you risk bulldozing the sand beneath the pavers, creating a deep void or large hill. And as a result, you end up with sunken or raised pavers that you will have to replace later.

When you are laying the pavers, don’t lay them in such a way you end up with a long linear line as you will have unstable pavers. The best way to avoid doing this is to work with expert masonry contractors Long Island.

Is It OK To Put Lemons Down The Garbage Disposal?

You must have heard about the effectiveness of lemons at cleaning and freshening up drains. Since lemons are heavily used in cleaning drains and garbage disposals are part of the drainage system, you must be wondering, is it ok to put lemons down the garbage disposal? The answer to this question is yes, lemons are 100% safe to use in your garbage disposal.

If you want to use them, commercial appliances repair professionals recommend you slice the lemon into a few pieces, then squirt a few drops of the lemon juice into the opening of the garbage disposal and let it sit there for a few minutes to loosen anything that might have caked onto the disposal blades.

You should then run water in the sink and let it flow into the disposal opening. Then, turn on the disposal and drop in the lemon chunks until they are pulverized. The citrus juice and the rind texture will clean the garbage disposal blades and freshen the disposal.

Although lemons are safe to put in the garbage disposal, it doesn’t mean you can put anything down there. There are plenty of materials you shouldn’t allow in your garbage disposal. They include:

Coffee grounds

Although they appear fine, coffee grounds are densely packed, and they are almost paste-like when you take them out of a filter. If you make the mistake of putting them in the garbage disposal, you end up with a pile of gunky sediment in your drains, increasing the chances of a clog.

Eggshells

You must have come across information that eggshells help with sharpening garbage disposal blades, but this isn’t the case. We can say the garbage disposal has impellers rather than blades that grind food waste down rather than chop it up with a blender.

When is the last time you used an eggshell to sharpen your kitchen knife? If you have never used it, it means it’s ineffective at sharpening the garbage disposal blades.

To add salt to injury, the eggshells have membranes that can easily get wrapped around the grinder, creating a host of problems for your appliance.

Potato peels

There is no upside to throwing potato peels in your garbage disposal. When you do it, two things can happen: the peels maybe thin that they slip past the disposal and end up in the drains increasing the chances of your drains clogging, or the peels might also get ground up and turn into a starchy paste in the garbage disposal.

In the event the paste makes its way into the pipes, it might cause serious blockages that are difficult to get rid of.

Animal bones

The garbage disposal appears tough on a casual look, such that you have the impression you can use it to grind almost anything, but oh boy…how wrong is this? Despite the tough outlook, the garbage disposal isn’t designed for grinding exceptionally hard items.

Bones are one of the hardest items you find in the kitchen, and when you frequently grind them, you significantly reduce the lifespan of the disposal unit.

While bones are destructive to the garbage disposal, don’t panic when you accidentally drop a small fish or chicken bone down there as the garbage disposal can handle it. While this is the case, anything larger than the bone will spin around the disposal, damaging the grinding mechanism so ensure no large bones get into the unit.

Rice, pasta, and bread

These things have one thing in common—they absorb water and expand, which can easily lead to clogs. While this is the case, commercial garbage disposal repair Springfield professionals advise against panicking when you leave some spaghetti in the disposal as the system can handle it. You only need to ensure no large amounts of the materials find their way into the system.

appliance repair, garbage disposal, garbage disposal unit, garbage disposal blades, cleaning garbage disposal, garbage disposal tips, garbage disposal tricks, commercial appliances repair, commercial garbage disposal repair,

Why Is My Fridge Leaking Water Onto The Floor?

refrigerator repair

Why is my fridge leaking water onto the floor? If you are asking this question, this might be the first time you are seeing the water. Although it’s a common issue, water pudding under the fridge is never a good sign and you have a reason to be worried.

Thankfully, according to refrigerator repair professionals, the problem is often easy to fix. If you are having the problem, here are some of the common reasons for it and what you can do about it:

You have left the refrigerator door open for a long time

If you leave the refrigerator door open for a long time, the fridge will slowly build up water due to the incoming warmer air. This can sometimes overwhelm the evaporator systems leading to leaks.

To fix the problem, you simply need to close the fridge door. To prevent the problem from coming about in the future, avoid leaving the door open for extended periods of time.

If you have a modern refrigerator with an alarm that signals when the door is open for a long time, turn it on.

The fridge isn’t level

If you recently purchased the fridge, recently remodeled your kitchen floor, or moved to a new house and you just realized water under your fridge, the appliance might not be level.

When the fridge isn’t level, the coolant doesn’t flow freely, and it pools in the pipes, forcing the fridge to work harder than it should. This creates extra condensation around the coils that end up dripping water on the floor.

To fix this, you need to level the fridge. Place a level on the floor of the fridge then make the adjustments.

To make adjustments, remove the grill from the front bottom and adjust the legs or rollers. You might need a screwdriver or wrench depending on the model of the appliance.

To ensure this doesn’t happen again, aim for a ¼ to ½ inch rise in the front and check the level.

The water inlet valve is damaged

The water line connects to the back of the fridge and it can be damaged or loose leading to water leaks. The water inlet valve that connects the waterline at the back of the fridge might also have a slight leak causing a water puddle.

To fix the issue, you need to find the source of the problem. Unplug the fridge from the power and slide it out from the wall. Then use a flashlight and check if the waterline or water valve has any leaks.

If there are any leaks present, tighten up the leaking area or remove or replace the affected parts.

Blocked defrost drain

The defrost drain clogs because of food particles and other debris. As a result of the clog, ice builds up, and eventually, water leaks out of the freezer and fridge.

To fix the problem, you should flush the drain from the inside of the freezer with warm water using a small funnel or turkey baster. You can also use a coat hanger or pipe cleaner to forcibly remove the clogging material.

If this doesn’t work, manually remove the debris causing the clog.

What if you can’t find the source of the leak?

If you inspect the appliance and you can’t find the source of the leak, contact an appliance repair Springfield professional to help you out. A professional contractor will carefully troubleshoot your refrigerator and fix the problematic areas.

For peace of mind, the contractor will do a good job, take your time when hiring. Ensure the contractor is experienced enough. It also doesn’t hurt hiring an insured technician as accidents happen anytime and you don’t want to be liable when they happen.

Is It Better To Add Onto A House Or Move? Home Addition Companies Advise

home addition companies

You know you need a bigger house. Maybe you need a separate home office, or you have a baby on the way, or the baby is already here, and everyone is on top of each other.

Should you buy a bigger house or hire home additions companies and add-on to your current house? Is it better to add onto a house or move? You wonder.

We’ll advise you to build a home addition instead of moving. This is because doing so comes with plenty of benefits that include:

It’s less expensive and less stressful.

It’s true you have to live in a construction zone (until you complete the renovations) but even going through it is less stressful and less expensive than moving.

When moving, you have to look for a home, pack your belongings, sell the house, then move to a completely new neighborhood.

You will agree with me this is extremely stressful and expensive, right?

You increase your home value.

Studies show that most homeowners renovating their homes rarely recoup their money, but if you do it right under the guidance of a home additions expert, you can increase the value of your house.

For example, if you live in a high-value neighborhood or a fast-appreciating housing market, you can increase your home’s value by adding a few square footages to your property.

As mentioned, most home remodeling projects are break-even at best and often don’t end up increasing the value of a property by astronomical amounts.

So if you aren’t planning to sell your house soon, don’t renovate the house to sell it. Do it to create enough room for yourself and your family.

You customize the space to your liking.

When you buy a house, you find an already designed house. While you can customize the space, you can’t get away with as many aspects as you would have, had you put up the house from scratch.

You take less time than buying a new home and moving.

Real estate experts report that the average closing time for new purchases is 46 days and this doesn’t include finding a new home, secure financing, and beginning the house selling process.

With home additions, you complete your project in less time, and you don’t engage a lot of people in it.

You live in your preferred neighborhood.

If your kids are in a good close-by school, you commute easily, and you love your neighbors, there is no reason to move. Simply renovate the house and live in your preferred area.

Staying in one place increases your stability.

Let’s be honest. Hopping from one place to the other destabilizes you. You spend a lot of time, you have to acclimatize to the new area, find new friends, find new schools for the kids, among many other aspects.

When you build a new addition to your current home, you negate all this hustle. You sit put, get a contractor, and make the relevant renovations.

You fulfill your vision.

Every homeowner has a vision for their home. And unless the vision is moving to a new neighborhood, you can’t achieve the vision by moving—you have to stay in your current area for the vision to take shape.

Is it better to add to a house instead of moving? Yes.

Staying put and building a new addition is the way to go if you love your neighborhood and don’t want to go through a lot of stress. Find a reputable home addition builder DC and build the house of your dreams.

Sewer Cleaning Companies: Tips On How To Get Rid Of Sewer Gas Smell

sewer cleaning companies

When you smell sewer gases in your home, it means you have a serious problem you should address as soon as possible.

According to sewer cleaning companies, the gases are a combination of ammonia, hydrogen sulfide, and methane, and continuous exposure to them leads to memory loss, poisoning, headaches, dizziness, and asphyxiation. In large enough amounts, these gases put your home at the risk of fire or even an explosion.

Have you been smelling the gases in your home and are worried of your life and health? Here are tips on how to get rid of the sewer gas smell:

Clean the sink overflow

The sink overflow is the hole located underneath or across the faucet. The sink overflow is often prone to accumulation of bacteria, hair, and soap scum, and when a clog happens, foul smells result from the sink. If you live in areas with hard water, mineral buildup can also prevent the overflow from draining as well as you would want it to.

To eliminate the awful smells, you need to identify the source of the odors and if the smell is coming from the sink overflow, clean it. You can use a small bottle brush to clean out the hole or wipe away any present buildup. You can also mix a solution of chlorine bleach and half water and clear out any grime present in your sink.

Caulk the toilet base

If your toilet isn’t currently caulked, chances are water is leaking out, creating an unpleasant smell. You can bring these smells to a stop by caulking the toilet to the floor. This not only eliminates the smells, but it also secures the toilet, which is a win-win for you as a homeowner.

The cool thing is you can do it on your own (if you love DIY projects) without involving a technician. To do it:

Remove any caulk from around the toilet base using a razor knife or utility knife. You should then clear away any debris using a general bathroom cleaner then apply masking tape to the floor around the toilet. With the caulk or caulk gun at 45 degrees, place the caulk along with the space between the toilet and floor. Once you are done, peel off the masking tape you had applied earlier.

Clean out any bacteria growing in your drains

If you rarely clean your drains, they might be full of soap scum and organic matter that provide the perfect environment for bacteria to thrive. Luckily, you can easily clean out the existing bacteria and prevent new bacteria from growing.

Two of the easiest ways to do it is to use baking soda and vinegar, and enzyme-based cleaners. To clean the drains using baking soda and vinegar, mix the two in the target drains and listen to the sizzling and bubbling noises that signify the mixture is working. Wait a few minutes, then flush the toilet or run water down the drain.

If the smell still won’t go away, repeat the process.

If the above still won’t get rid of the smells, try getting rid of them using enzyme-based cleaners. These cleaners are excellent bacteria cultures and concentrated enzymes that naturally eat away at the organic matter.

The chances are that if the sewer smells are due to dirty drains, doing this will eliminate the odors.

Take a look at bathtubs and sinks.

Are there bathrooms or sinks in your house you rarely use? They might be the culprits. Run hot water down the drains, and this will ensure the P-trap is full hence keep the bad smells away.

When you do the above, you have a 95% chance of putting the embarrassing smells away. If you have done everything, but still they linger around, contact commercial drain cleaning services providers to inspect your system as you might be having a more severe problem.

Can You Use Bleach On Quartz Countertops?

quartz countertops

If you are asking, can you use bleach on quartz, you must have made a serious mess on your countertops and looking for a powerful cleaner, right? The short answer to this question is no, you can’t use bleach on quartz as it has been shown to harm it. In fact, you don’t need it.

Quartz countertops are non-porous, meaning they are resistant to bacteria and staining. Due to this, you don’t need to use harsh cleaning products such as bleach.

Bleach has been shown to damage quartz surfaces where it etches it and can even permanently discolor the slab.

Also, using bleach on your cooking surfaces is harmful as the toxic chemicals can get into your food.

The cool thing is you don’t need fancy or tough products to clean your countertops. Here is a guide on how to go about it:

Routine ways to clean quartz surfaces

As mentioned, quartz is non-porous, so you don’t need exotic cleaning products. At least once a day, use a soft cloth or sponge and warm water to gently wipe down the quartz tops.

Is there dried gunk on your surfaces? Use a putty knife to scrape off it off. When doing it, be mindful and scrape gently.

If you regularly prepare food on your counters, chances are they are greased. To remove the grease, use a degreasing agent. You need to spray the agent generously on your counters, give it time to interact with the grease then wipe it off.

Removing tough stains from your quartz

If you got tough stains you can’t remove with soap and water, use an adhesive remover. To remove the stain, pour the cleaning agent directly on the stain and let it sit for 5-10 minutes then wipe it off. The adhesive remover works by pulling off the stains with its sticker like qualities.

Isopropyl rubbing alcohol is another excellent product to remove the stubborn stain. Wet a rag in the alcohol then rub it on the stained area.

If this still fails, consider using a glass cleaner. Pour glass cleaner liquid on the stain and let it sit for a few minutes. You should then wipe it off with a wet cloth. You should note that some companies have an issue with you using a glass cleaner, so before you use it, contact the quartz company and ask them about it.

How to keep your countertops in top shape

To avoid having to clean the countertops, you should take good care of them. Thankfully, there are plenty of ways you can do it. Some of these ways include:

Clean the spills as soon as they happen

Although engineered stones such as quartz are resistant to stains, when you let spills sit on them for a long time, they can get deep into the countertops leading to stains. To prevent this, make it a habit to clean the spills as soon as they happen. For ideal results, use mild soap and warm water to clean it up.

Protect the countertops from high temperatures

Like other countertop materials, quartz can be damaged by high temperatures. To prevent this from happening, protect them using mats, trivets, coasters, and other protective materials. Don’t place anything scorching directly on the countertops as you will cause extensive damage.

Use a cutting board

You might have the impression that the countertops aren’t natural like granite countertops Rockville so you can cut directly on them, but this isn’t the case. Cutting, chopping, or slicing directly on the countertops is harmful to the surfaces. While the surfaces are scratch-resistant, they aren’t scratch-proof, so aim to protect them at all times.

Another reason you shouldn’t cut directly on the counters is to protect your knives from getting dull.

5 Roofing Mistakes You Might Be Making As Given By Roofing Companies

roofing companies

Did you know you could be hurting your roof without even knowing? Here are some of the most common mistakes people make as given by roofing companies:

You have been over insulating your home.

The more the insulation you have, the better, right? Wrong. If you have insulation in the attic or the contractor you hired went overboard with it, it could spell bad news to you. When you over insulate your home, you prevent your home from breathing as well as it should.

For the roof to last for a long time, it needs proper ventilation, and when it lacks it, you begin experiencing issues such as moisture getting trapped in the roof leading to mold growth.

As you know, mold brings about plenty of issues, so you need to get rid of it as soon as possible.

You rarely inspect the roof.

Many people have the notion that they are out in the green as long as they have installed high-quality roofing materials. Unfortunately, this isn’t the case. When you allow your roof to go for years without any repairs or maintenance, even the most minor issues get worse to the extent you have to bring down the entire roof.

To prevent this, you should make a habit of going up your roof and inspecting it. For best results, inspect the roof once every two to three years. You can inspect it on your own, but if you feel you don’t have the necessary skills, let an expert help you out.

When you regularly inspect the roof, you identify problems when they are in their initial stages and fix them before they get worse.

You rarely clean the roof.

You might have the impression that dirt on the roof is not a big deal as the roofing materials are designed to withstand tough weather elements, but when you allow a lot of dirt and debris to accumulate, you put the roofing material at the risk of decaying.

The risk of damage is extensive if the roof is made from metal. Like roof inspection, make a habit of cleaning your roof once every two years. This way, you have peace of mind your roof is in good condition, and your loved ones are protected.

You clean the roof with a pressure washer.

It’s good to clean the roof regularly, but when you wash it with a pressure washer, you set it up for trouble. When you use the pressure washer or continually pour bleach on the roof, you cause deterioration of roofing materials.

When you start noticing granular loss, cracked shingles, or excessive moisture pooling, you are over-cleaning your roof.  If you feel you aren’t cleaning the roof as well as you should, ask trusted roof repair service providers to help you out.

You ignore the attic.

The attic is spooky, and most people avoid it. If you are like other homeowners, you store the items you rarely use there, and you rarely go there.

While the attic is the most rarely visited room in the house, it’s of great importance. If you want to catch any leaking problems before they get worse, you need to visit the attic regularly.

Have you recently had a heavy storm and want to have peace of mind your roof isn’t leaking? Step up there with a flashlight and see whether there are any issues. While in the attic, be on the lookout for light reflection from water streams.

Also, be on the lookout for mold growth during the humid months of the year.

Pool Builders: 9 Factors To Consider When Constructing A Swimming Pool

pool builders

Are you looking to construct a swimming pool? Other than hiring expert pool builders, there are plenty of other factors you need to consider. Some of these factors include:

Insurance

When you have a pool in your backyard, it significantly affects your homeowner’s insurance policy. This is due to the risk that comes with having the pool in your house. Before you install the pool, contact your agent, and determine if your pool will increase your premium payments.

Safety

Plenty of things can go wrong with a swimming pool. Kids can fall in the pool, your pets might fall in there, among many other things. As you are putting up the pool, think about your safety.

For peace of mind, install a fence with a self-closing, lockable gate. Ensure the gate is closed at all times to prevent the kids and pets from drowning.

Design

How will the pool look like after you have constructed it? In addition to it being functional, it also should complement the look of your house. For a great look, get a landscape designer to be involved in your project.

The designer will help you determine the right pool design to go for.  The designer will also guide you on how to construct the pool properly.

Shape and size of the pool

How big do you want your pool to be? This will depend on how you are looking to use the pool. If looking to use the pool for swimming, you want a rectangular one that is big enough.

In addition to determining the size of the pool, also think about the depth that is most ideal for your pool. If planning to have a diving board, ensure the pool is deep enough.

Site for the pool

Where do you want to locate the pool? Locate it in an area near the house where you can easily move the construction materials. If working on a budget, avoid installing the pool in a sloppy area as you will spend a lot of money leveling it.

Accessories

For a grand looking pool, it’s wise you have a pool with all the bells and whistles in place. This calls for you to have lighting in place, slide to keep the kids entertained, a diving board, ladders, steps, and handrails.

While these features are great, you should note they come with a hefty cost, so if operating on a tight budget, it’s a wise idea to stay away from them.

Pool deck

The area surrounding the pool will need a pool deck that you can make from pavers, stones, concrete, tiles, brick, and other materials. The cost of the pool deck depends on the square footage of the deck area.

You can install the deck by yourself if you have the skills or hire an expert to help you out.

Furniture

Do you love having outdoor furniture around your pool? You can install a chaise lounge, a table with chairs, or any other of your preferred furniture pieces. If you love sitting by the poolside, you want comfortable outdoor furniture. This means it should have cushions and everything else.

Pool equipment

There is plenty of pool equipment you need for your work. One of the equipment you need is a filtration system. You also need a pool heater that will help you keep the temperatures comfortable and extend the use of the pool.

Pool contractors also recommend you have a pool cover that will help you keep the pool clean. Also, think about the electrical and plumbing equipment you will need during installation. lagras